Housing Directions Page 2
| |
| |
| |
| |
| |
| |
| |
| |
| |
| |
| |
Faith Valley Waterfowl
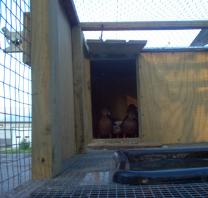
Step five- Next you put on your housing
front board. It is so important to get that
board installed before you put on the top
wire.
*This would be the point that we would
install the catch door or trap door. Cut a
12" wide by 23" tall board and hinge it to
the top of your pen. We use a hook and
eye to secure the door to one of the top
support boards of the pen. This door can
be closed to trap your birds inside of their
housing area. This will make it much
easier to catch those lively little guys.
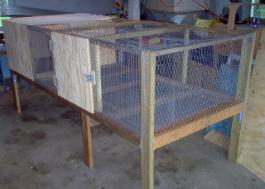
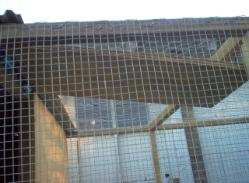
Step seven-Finally it is time to put
your top wire on and then your
housing roof. For wire we use 1/2 inch
hardware cloth for the flooring and
sides. We use 1 inch poultry wire for
the roofing ~ it is easier to fill the
pools that way as the hose can be
inserted through the top poultry wire.
For the house roofing material, there
are so many options. You could
chose to shingle, use sheeting metal,
or use the coragated roofing
materials. It is important to have the
roof extend past the edges of the
housing area, this will prevent rain
from entering your pen.
| Continued directions for building the 4x8 raised breeding/growout pen. |
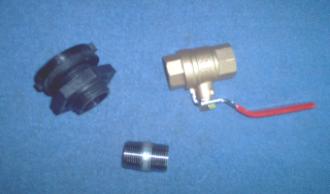
Should you choose to install a drain in the bottom of your mortar tub, you will
need to purchase three parts.
* 3/4" ball valve full port- make sure that when the valve is in the open position
that you can see straight through it, if it has a corner in there- it will get clogged.
(We all know what little calls do in their water.)
* 3/4" fitting tank this will be inserted through a hole that you cut into the tub.
*3/4" x 1 1/2" galvanized nipple this will be attached to the fitting to give you a bit
of extension between the fitting and the valve.
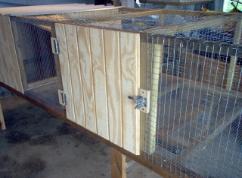
Step six *Next you will need to attach all of your side wire, try to pull it pretty tight
so that it has a snug fit.
* Add your housing side and back wood. We use a treated outdoor wooden siding
for our pens. It is available in 3/8" or 5/8 "; we find that the 5/8" is a better choice.*
Install both your back and side doors. We use a 24 inch door cut from the 5/8"
outdoor wooden siding. Remember that the thinner the wood, the more likely the
board is to bow; to insure a proper fitting door, select a heavier board.
* We use quick release latches on our pens. We find them very easy to work with
and there is the added benefit of inserting a padlock into that particular door latch.
* We have found that it is best to use hinges that allow the door to open and lay
flush against the side of the pen; a door that doesn't lay flush or one that extends
past the side of the pen will cause difficulties in the future.
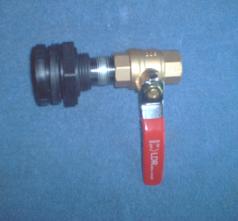
Here is what the assembled drain
would look like.
* You will need to drill a hole through
the bottom of the mortar tub to install
this. You must take into account the
placement of your support shelf
though. Make sure that you have
enough room to turn the lever while
the tub is resting on the shelf.
would look like.
* You will need to drill a hole through
the bottom of the mortar tub to install
this. You must take into account the
placement of your support shelf
though. Make sure that you have
enough room to turn the lever while
the tub is resting on the shelf.
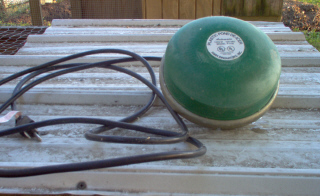
The final piece of equipment that I use is a floating water de-icer for the
winter months. Here in Ohio it does drop below freezing so the de-icer is a
great help. The drain valve will freeze in the winter so the tub must be bailed
out, but the de-icer will keep the tub free from ice.
In the winter, I also will cover most of the sides and the top of the pen with a
clear plastic to keep the calls out of the strong winds. It is important to extend
the clear plasitc down the sides of the pen clear to the ground. This will
prevent the cold winds from coming up from below the pen and freezing little
feet.
~ I only use the de-icers in the 23 gallon tubs. I do not use them in the 11
gallon tubs.~
| Winter Care |
| mortar tub drainage system |